Baby blankets were one of my favourite gifts to receive when our boys were babies. With all the spit up and drool going on with our little ones, it was always great when there was a receiving blanket on hand to wipe it up. They were also great for swaddling them in nice and tight when they were still in the newborn stage. There’s nothing so cozy as a newborn baby snuggled nice and tight! Why did my babies have to grow up so fast!
Usually the flannel in our local Fabricland (our area’s equivalent to the US’ Joann’s), has a very good selection of soft flannel which I love to browse. Every time I tell myself that I should grab it when it’s on sale (which is quite often!), but it never fails that when I do need to make receiving blankets, it’s full price. One of these days I’ll learn and just stock up when the price is right!
These double sided receiving blankets are really quite simple to make. This is actually a great project for beginners! Essentially, you have to squares of fabric the same size which you pin together, sew together, turn right side out, and topstitch. Very simple and straight forward and I’m sure they’re are oodles and oodles of in depth tutorials on the nitty gritty details. What I’m going to share with you is how to make that process even EASIER and QUICKER.
- This job is so much easier with the right tools. A rotary cutter and its self healing mat, pins, scissors, and a sewing machine is really all you need to get this project on the road to finished.
- I highly recommend any and all who are looking to sew to get a rotary cutter. The rotary cutter is BEST INVENTION EVER for the sewer or quilter!!! Yes… you can do with scissors, but I promise you, once you’ve gotten your hands on a rotary cutter, you will never go back. Ever.
- Pins are essential for making this job so much easier as well. In my opinion, you can never pin enough. It may seem like a pain initially, but it saves you from having to painstakingly get the stitch ripper out and redo those stitches.
- Scissors are great for the trimming and snipping those loose thread ends.
- And, finally, a sewing machine is…well… for sewing the project together…unless of course you’re planning on doing it with a good ole fashioned needle and thread (and then my hat’s off to you for giving it a go!)

2. When you lay your fabrics to trim, lay the pretty or right sides together right away. This saves me from having to reposition the fabrics when every thing is trimmed up to size. I make sure that the manufacturers’ edges are lined up and trim the rough edges (the ones cut from the fabric store).

3. When you get to trimming your fabrics…don’t be afraid to trim enough off of the edges. When you can get a nice even cut with your rotary cutter and get ALL of the layers the right size right away. Instead of realizing later on that the bottom fabric is an inch smaller and having to go back and retrim…just trim it right away with enough clearance for ALL of your layers.

4. This is a really simple tip…but one that has saved me many times from sewing the whole blanket together only to realize that I didn’t leave a hole for turning it right sides out. I double pin the beginning and ending to give myself an added reminder that I need to stop and start sewing in these positions.
5. Also, remember to backtrack your beginning and ending stitches. This leaves the hole reinforced when you have to turn the blanket right sides out leaving you without worry that you might have to redo some stitching.

6. Leave a big enough hole to turn your blanket around. Yes… you can turn the whole blanket around with an inch hole…it’s a huge pain in the you-know-what… but so much easier with a little wriggle room! I usually leave a 5 inch gap which gives me enough room to flip everything right sides out.

7. Trim those corners and any seam that ended up being a bit more than a 1/4 inch seam allowance. It makes for nicer corners and when you’re snuggling with that cute little baby, you can admire the nice neat corner and pat yourself on the back for not skipping this step.

8. Use your scissors to get nice clean corners. There are special tools for this, but my scissor is always at my finger tips when I’m sewing…one less thing to look for when you’re in a hurry to finish up your project!

9. Pin your opening closed. It’s really easy to skip over this step, but it’s so worth it to get the opening closed neatly before sewing it. I’ve learned that it’s worth the effort of putting a few pins in…anything to avoid using that dreaded stitch ripper!

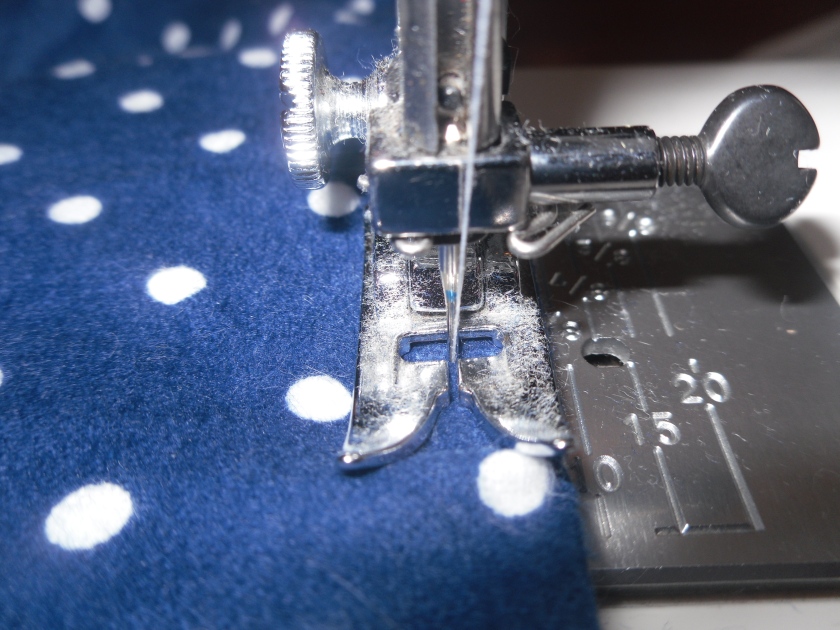
10. For a clean, consistent topstitching, line your presser foot with the edge of the fabric. This will give you a nice and straight line of stitches that will get all your friends wondering how you manage to sew so straight!

11. Plan your project ahead of time. For this project, I looked to see what colour thread would work for both blankets. It may seem silly but changing my thread half way through finishing a project is one more step that I like to avoid. For these blankets, I used white thread that worked well for both.
Enjoy your finished project!

Until next time!
Rachel


